Active Shifts
The user can view the active shifts and add new users to shifts, print x reports, print z reports, and end shifts.
At the top you can see The opening balance of this specific shift

Actions:

You can close user shift and print x report by clicking on “Close user shift”Comment

A confirmation message will appear:

X-Report: A detailed report that shows the sales, returns, payments received, currencies used, etc.. for a specific user after closing his shift
Z- Report: A detailed report that shows the sales, returns, payments received, currencies used, etc.. for all users. Hence, for all shifts that have been closed during the day.
Please notice that printing a z-report requires all the active shifts to be closed since it’s naturally, an end of the day report.
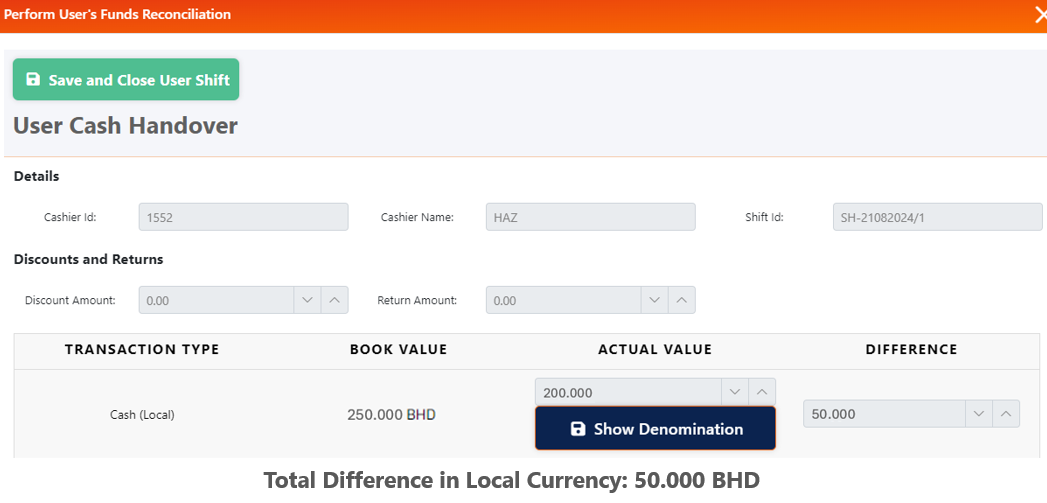
After that you can perform user funds reconciliation:

User Cash handover will show, Click on Save button to close user shift:

Add New Shift User:

Search User Id/Name, Select devices and set Opening Balance
Opening Balance: the amount of cash handed in at the beginning of each shift, and it can be set as a default in the POS policies, there’s no need to enter the amount each time.

Click on Start button to start the user shift


Status of this specific shift will show at the top of the page:

Once all the shifts are closed, status will be:

If the cashier is currently not working on the POS screen, the shift status will be:

Shifts
This page displays the session breakdown of users across all shifts.

The specific user can be searched by the search bar by the user name.
User shift details:
To view the user shift details, DoubleClick on the record, and the system will display the user’s shift details.
Filtering:
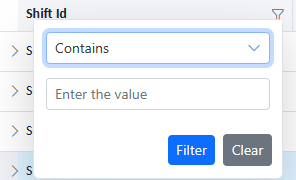
Filtering: Click on the filter icon to open the filter and enter the value to filter for or use the search bar to find the desired record.

Shift ID: Unique identifier for each shift.
User ID: Unique identifier for the user associated with the shift.
User: Name or username of the user.
Shift Started: The date and time when the shift begin.
Shift Ended: The date and time when the shift ended. If the shift is still active, it will show as “ongoing.”
Date: The date of the shift.
Number of Bills: Total number of transactions or bills processed during the shift.

Each shift has an expand button that shows the payment types used for the bills in that shift. ( Cash, Mobile payment .. )
Double Click to view specific shift :
Choose Bills or Sessions Tab, All Bills and sessions made by this user will display:


Cash Handover
This page is designed to manage and track cash transactions across different shifts. It shows all active shifts, including the date, the current active users, the total opening balance, and whether a shift has been closed.

The page also displays a history of previous shifts, where you can view details like: total number of users, total sales generated during the shift, and the shift’s status (whether it’s still open or has been closed).

Filters:
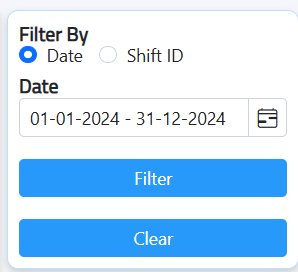
You can filter by date or specific shift ID
Cash Handover details:
When you double-click the “View More” button, it displays the details of a specific shift’s cash handover. This includes:

Cashier ID: The unique identifier of the cashier.
Cashier Name: The name of the cashier.
Opening Balance: The amount of cash the cashier started with at the beginning of the shift.
Cash Sales Amount: The total cash collected from sales during the shift.
FX Amount: The amount received in foreign currency and its equivalent in the local currency.
Discount Amount: The total discounts applied during the shift.
Returns Amount: The total value of returned items.
Reconciled: Indicates whether the shift has been reconciled (if the cash on hand matches the system’s records).Comment
Double Click Entry To View More:
When you click on a specific shift, the page will display detailed information about that shift for a particular user.
The details include:

Cashier Id: The unique identifier for the cashier
Cashier Name: The name of the cashier
Shift Id: The identifier for the shift
Discount Amount: The total discounts applied during the shift
Return Amount: The total value of returned items during the shift
Sales Insights:

Transaction Type: This refers to the type of transaction, for example: Cash
Book Value: The expected cash amount recorded in the system
Actual Value: The actual cash counted
Difference: The difference between the expected and actual amounts. The “Show Denomination” button can be used to display the breakdown of the cash by denomination.
Invoices
Point-of-Sales Invoices
The following provides a convenient and efficient way to look up and print invoices.

Enter the invoice barcode and click on the retrieve button
If the barcode is found the system will display the invoice to be printed.
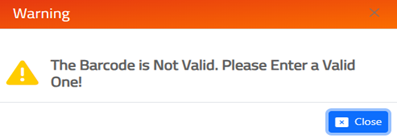
If the barcode is not found the system will show a message saying the barcode is invalid.
Proforma Invoices
This page contains all the necessary information about the delivery and also displays the status of each delivery for the list of delivery notes for all the locations of the current company.
Search Filter
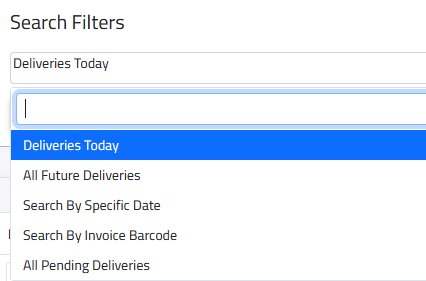

Select the type of search filter to be used and click on the search button and the system will filter and display the data.
POS Downloads
Download categories, Products, or Currencies at the Point of Sale

To download Currencies, click on the Currencies tab.

Click on the button “All.”
The system will get all the latest currencies from the company.
Filtering:
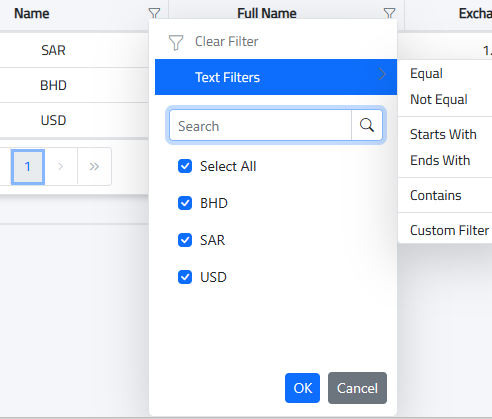
Filtering: Click on the filter icon to open the filter and enter the value to filter for or use the search bar to find the desired record.

Then click on the save draft button.
Once the save draft button is clicked the status changes from “viewing'” to “draft saved”

Then click on the download button.
Once the download is complete the system changes the status to “downloads posted”
These currencies can be now used all over the POS module.
Note: If the currency denomination is present then when the currencies are updated by downloading the currencies in the POS download page, the currency denomination will automatically be updated.

To download products, click on the products tab.

Select the location.

Click on the retrieve button.
There are multiple product retrieval options:
- Download all products:
- BY category, for this the user should select a category and then click on the retrieve button.
- Latest Updated price, select the price modified date range and then click on the retrieve button.
- Latest updated or created products, select the created/ modified date range then click on the retrieve button.
- By the barcode, Enter the barcode then click on the retrieve button.
Filtering:

Filtering: Click on the filter icon to open the filter and enter the value to filter for or use the search bar to find the desired record.

Once the system gets the data, it will display the data in a table, click on the save draft button.
Note: The act of downloading all the products or categories will initiate a reset on the POS (point of sale) system.
Once the save draft button is clicked the status changes from “viewing'” to “draft saved”

Then click on the download button.
Once the download is complete the system changes the status to “downloads posted”
These products can be now used all over the POS module.
To download categories, click on the categories tab.

Click on the button, the system will display all the retrieved categories.
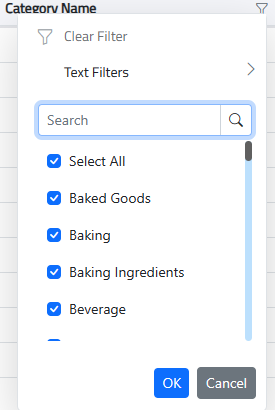
Filtering:

Filtering: Click on the filter icon to open the filter and enter the value to filter for or use the search bar to find the desired record.

Then click on the save draft button.
Once the save draft button is clicked the status changes from “viewing'” to “draft saved”

Then click on the download button.
Once the download is complete the system changes the status to “downloads posted”
These categories can be now used all over the POS module.
Retrieval History

To view the history, click on the view history button.
