
Reports
Inventory Report
Generate a report that lists all the products that have a transaction on the stock.
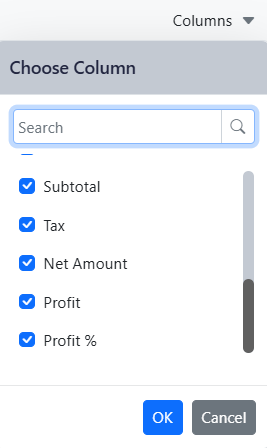
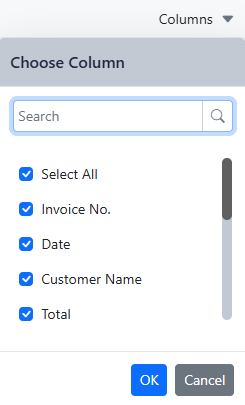
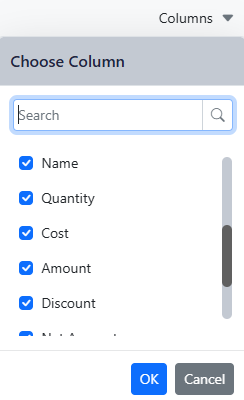
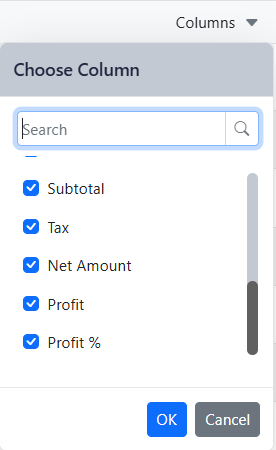
Manage Columns:
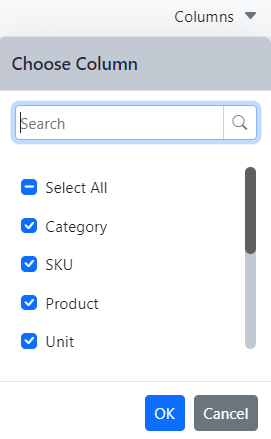
Select the columns to be visible.
Filter & search

1. Search by: Specify the criteria for searching within the report, such as keywords or identifiers.
2. Tag: Select tags to filter data based on specific labels or classifications.
3. Parent Category: Choose the main category under which the data falls.
4. Sub-Category: select from the drop-down list the sub-category within the chosen parent category.
5. Location: Filter the report based on specific locations
6. Supplier: Select the supplier to filter data related to specific vendors, click on the “eye icon” to view supplier detail

7. Period: Set the date range for the report to include data within that time
8. Qty: Apply quantity filters to focus on specific amounts or ranges of items.

Click filter and export the inventory report in 2 formats.

print pdf or export excel.
Purchase Summary Report
A Purchase Summary Report is a document that shows a summary of all purchases made within a specific period. It typically includes: Total amount spent, cost of goods sold, profit percentage and taxes or discounts applied.
Manage Columns:
Select the columns to be visible.
Filter & search
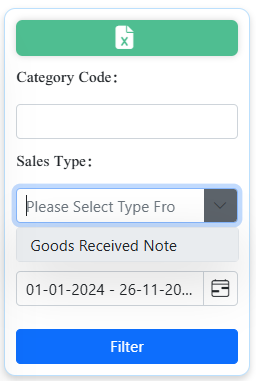
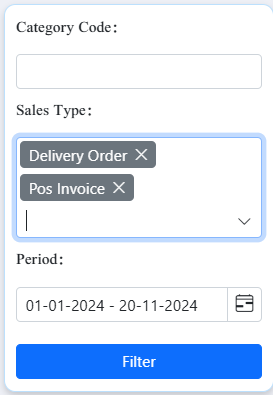
1. Category Code: Search by specific category code
2. Sales Type: Filter the report by sales type: Goods received note.
3. Period: Set the date range for the report to include data within that time
The report also includes an overview of totals:
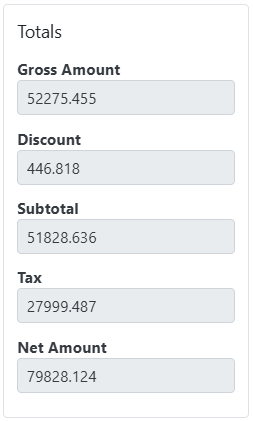

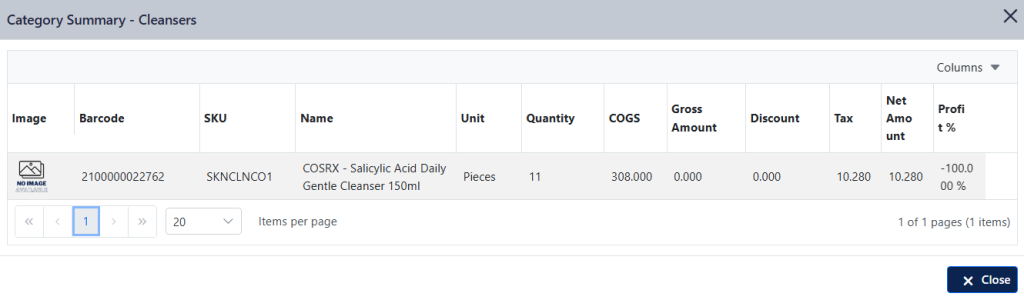
This report displays the product name, cost, quantity, cost of good sold, gross amount and profit percentage.
Note: Double-click an entry to view more.
Point of Sales Report
The point of sales financial statements are accessible for viewing and downloading through the following steps:
Select the type of report you wish to view

Invoice Details ( Basic )

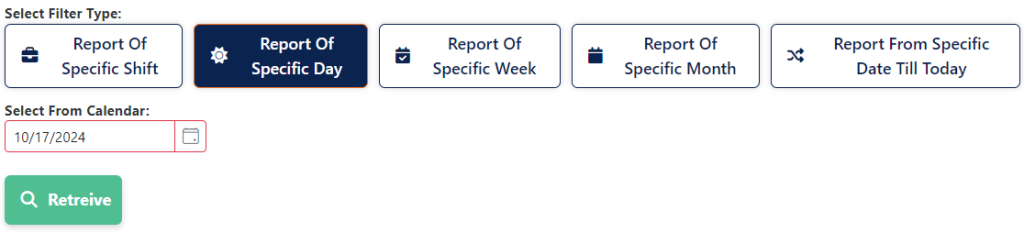
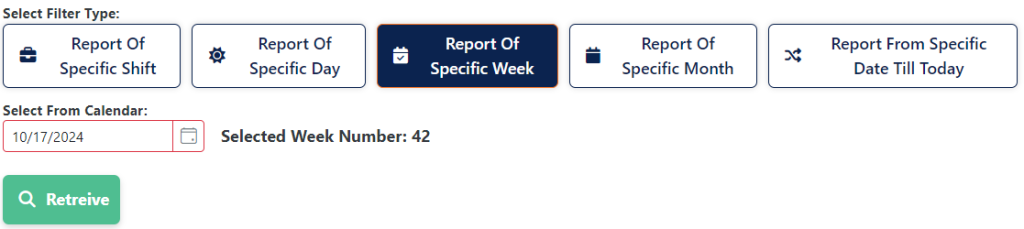
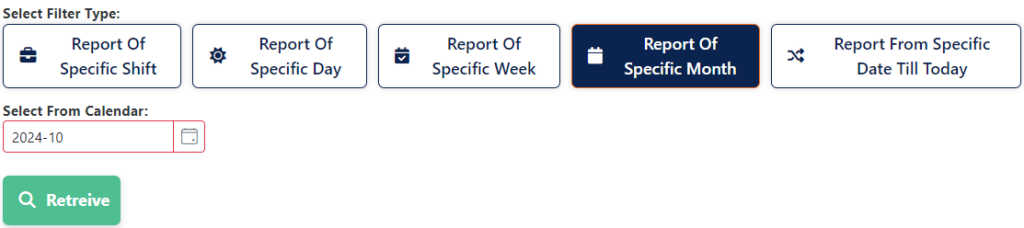
Select the filter type:
For the Report of a specific shift, Enter the Shift ID.

For the Report of a specific day, select the date.
For the Report of a specific week, select the week.
For the Report of a specific month, select the month.
For the Report of a specific Date till today, select the date.


Then click on the retrieve button.

The system will display the reports, click on the print report button.

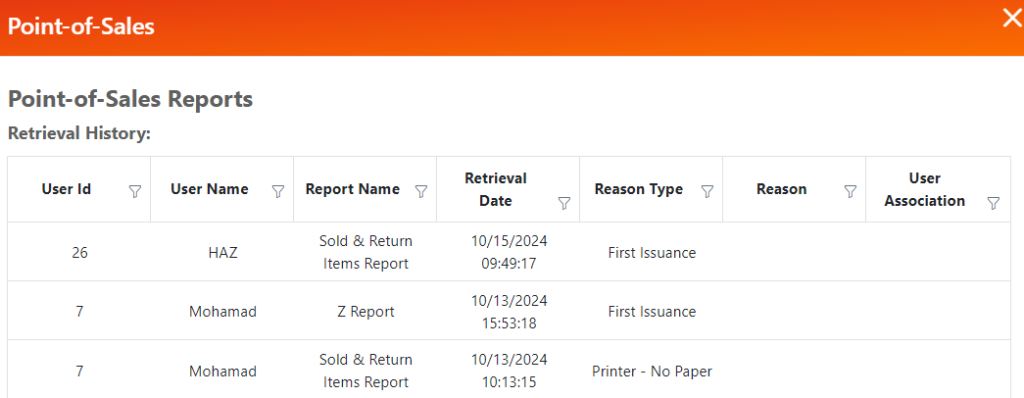
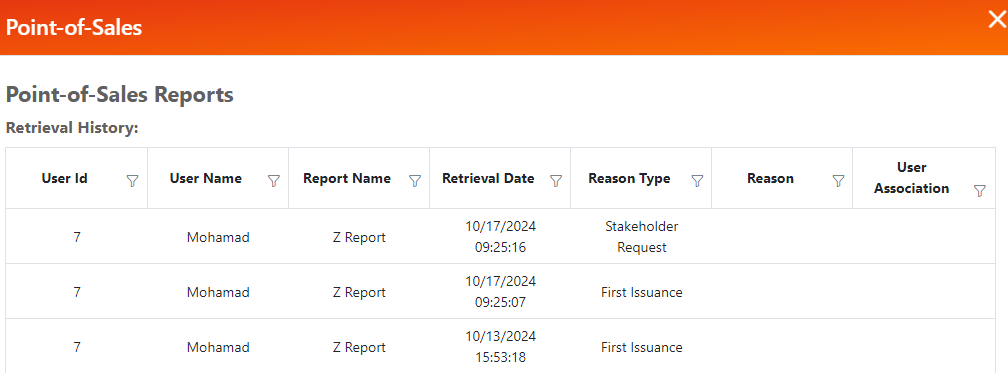
History:

To view the history, click on the history button and the system will display point of sales reports.
Invoice Details ( Advanced )
This report allows users to view and download detailed sales reports, categorized by shifts and their associated users
1. Select Report Type
Choose between two report types:

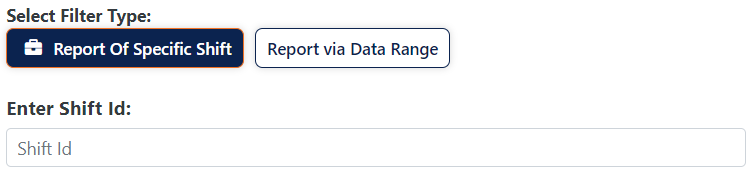
2. Select Filter Type:
Filter reports either By Specific Shift: Enter the shift ID to retrieve the data.
Or, By Date Range: Specify a date period to generate the report.
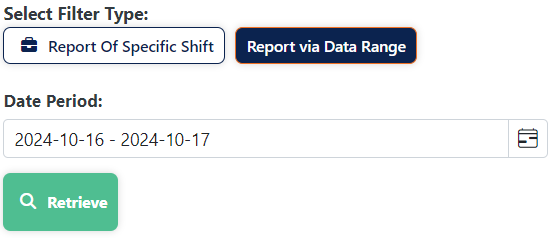
Click on retrieve button to show the relevant data based on your selected filter.
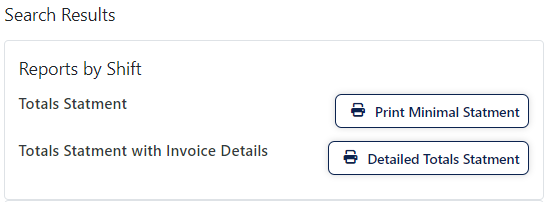
Reports will be displayed, showing sales data categorized by shifts.
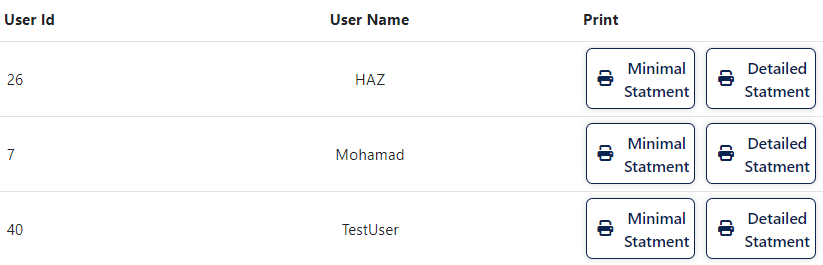
Minimal Statement: A summary of totals that can be printed. Detailed Totals Statement: Includes invoice details and can be printed for a more comprehensive report.
For each user in the shift, you can view and print:

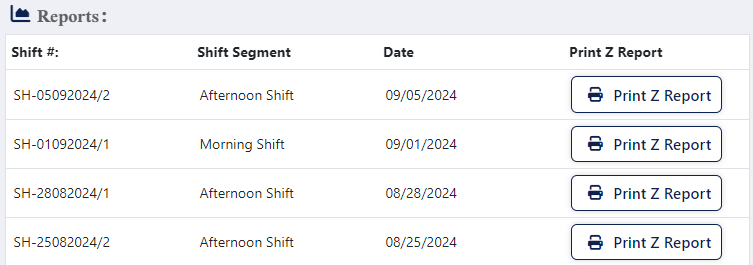
Z Report
Z- Report: A detailed report that shows the sales, returns, payments received, currencies used, etc.. for all users. Hence, for all shifts that have been closed during the day.
Please notice that printing a z-report requires all the active shifts to be closed since it’s naturally, an end of the day report.
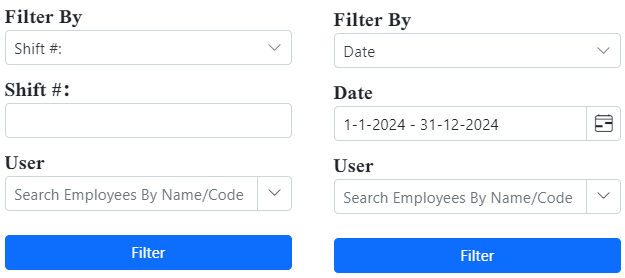
Select the filter type.
To view all Z reports, Click on All report

For the Report of a specific shift, Enter the Shift ID.

For the Report of a specific day, select the date.

For the Report of a specific week, select the week.

For the Report of a specific month, select the month.

For the Report of a specific Date till today, select the date.


Then click on the retrieve button.

To print the report, click on the print report.
If you reprint the report, you must select the retrieval reason for printing, ensuring security.


Then click on the print button.
History:
To view the history, click on the history button and the system will display point of sales reports.
X Reports
A detailed report that shows the sales, returns, payments received, currencies used, etc.. for a specific user after closing his shift
Select the filter type.
To view all Z reports, Click on All report
For the Report of a specific shift, Enter the Shift ID.
For the Report of a specific day, select the date.
For the Report of a specific week, select the week.
For the Report of a specific month, select the month.
For the Report of a specific Date till today, select the date.
Then click on the retrieve button.
History:
To view the history, click on the history button and the system will display point of sales reports.

Cash Handover Report
This report provides detailed information for each user, including their shifts, dates, and the types of payments processed. ( Benefit , Cash or Credit card )
You can Filter By Shift or Date:
Click on expand button to view all shift for a specific user


Credit Sales Report
The report lists sales made on credit, tracking outstanding balances and payment statuses.
Manage Columns:
Select the columns to be visible.
Filter & search
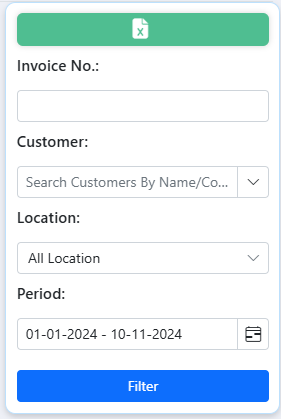
1. Invoice Number: search by a specific invoice number.
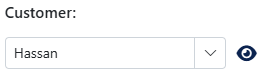
2. Customer: Customer: Select the customer to filter data related to specific customers. Click on the “eye icon” to view customer details.
3. Location: Filter the report based on specific locations
4. Period: Set the date range for the report to include data within that time.

Click filter and export the report in excel.
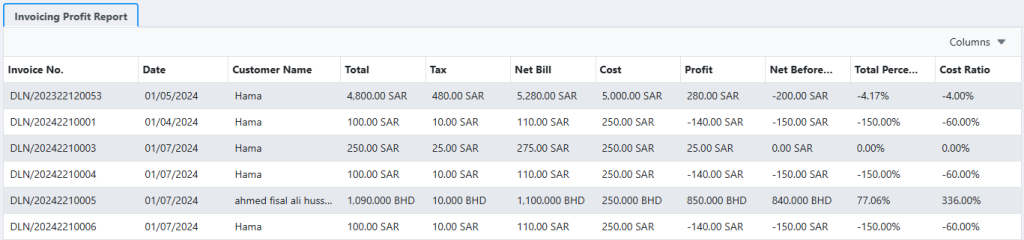
This report displays the invoice number, all customers, total invoice amount, total tax, and any discounts applied to the invoice. It also includes calculated profit and cost ratios.
Note: Double-click an entry to view more.
Sales Summary Report
The report provides an overview of total sales, showing revenue and performance metrics.
Manage Columns:
Select the columns to be visible.
Filter & search
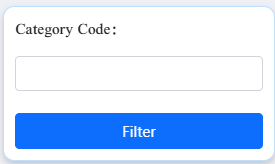
1. Category Code: Search by specific category code
2. Sales Type: Filter the report by sales type: Delivery Order, POS Invoice, or both.
3. Period: Set the date range for the report to include data within that time
The report also includes an overview of totals:
This report displays the product name, cost, quantity, cost of good sold, gross amount and profit percentage.
Note: Double-click an entry to view more.
Point of Sale Live Sales Report
The Point of Sale Live Sales Report provides real-time data on sales transactions, showing details like items sold, amounts, sales cost, gross amount & profit percentage. It helps monitor sales performance instantly.
Manage Columns:
Select the columns to be visible.
Filter & search:
Category Code: Search by specific category code.
The report also includes an overview of totals:


This report displays the category name, cost, quantity, cost of good sold, gross Amount and profit percentage.
Note: Double-click an entry to view more.
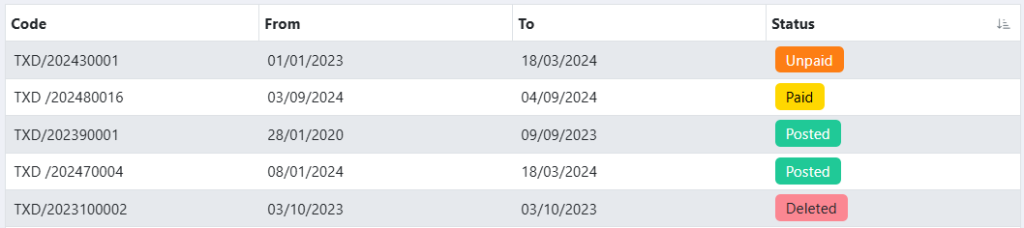
Tax Declaration Reports
The Tax Declaration Report is a comprehensive document that displays all tax-related transactions for a specific tax period. It ensures proper tracking and reporting of taxes in compliance with regulations.
To create tax declaration report, you first need to select:
1- Date range
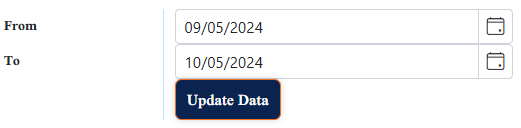
Use Update Data if you want to adjust the date range.
The report includes details like Description and Document Date.

Important notes:
1- The first tax entry is recorded normally and can proceed without restrictions. However, subsequent tax entries cannot be created until the previous entry is fully paid.
2- You cannot select a date that has already been used in another tax report.

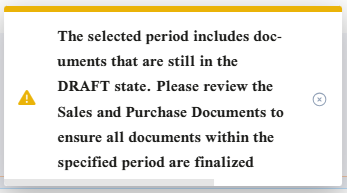
3- You cannot select a period that includes documents with DRAFT status. Please review the Sales and Purchase Documents to ensure all are finalized before proceeding.
The report covers:
- Sales and Purchase Taxes: Lists all taxes collected on sales and paid on purchases during the tax period.
- Adjustments: Includes any corrections or modifications to previously declared taxes.
- Tax Due or Paid: Displays the total tax liability or payments made within the current tax period.
The report shows:
- Total Tax Due/Paid for the Tax Period: Summarizes taxes owed or settled during the period.
- Balance brought Forward From Previous Period: Shows any carried-over payments from earlier periods (default is 0 BHD).
- Corrections From Previous Periods: Reflects any changes to taxes declared in past reports.
- Net Tax Due/Paid: Provides the final calculation of tax payable or refundable.

After posting the record, you can click Paid to settle the tax. If you click Unpaid, the tax will remain unpaid and will carry forward to the next report as Balance Brought Forward.
Export the Report in 2 formats.

Print pdf or export excel.