Master Data
Suppliers
The suppliers page allows you to add, view, and manage supplier information, including contact details, banking info, and payment terms. You can also customize views and group supplier.
Note : Any record within the accounting module will be displayed here.
Create a New Supplier
Before adding a supplier, you can define payment terms and supplier groups. These terms and groups will be associated with the supplier.
Payment Terms
The Payment Terms page lets you define and manage payment conditions, such as due dates and discount periods for suppliers
Creating New Payment Terms

- Click the Add button.
- Enter the name of the payment terms template.

- Click Save. Managing Payment Terms

- To view payment terms, click the Expand button.

- The system will display the terms under the payment template.
- To add new terms, click the Add button.
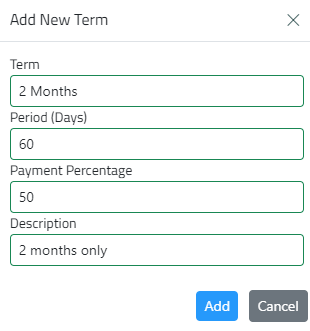
- Enter the terms name, duration in days, payment percentage, and description, then click Add. Editing Terms/Template


- Double-click the record or click the Edit button to make necessary changes, then click Update. Deleting Terms/Template

- Click the Delete button, and the system will remove the terms.
Suppliers Groups
The suppliers Groups page allows you to add groups, such as VIP suppliers. You can then use these groups when adding a supplier.
Creating a New Group

- Click the Add button and enter the group name.

- Click Save.

- Delete a supplier group by clicking the Delete button.
Adding a New Supplier
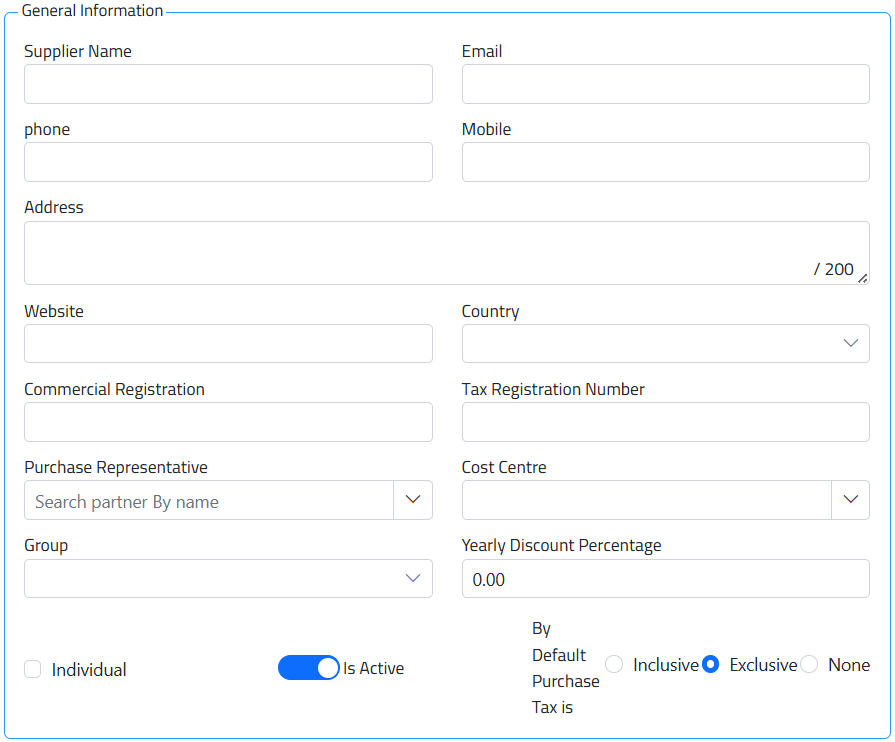
- Enter general supplier information: name, email address, phone number, address, website, and tax registration number, among others.
- Select the country.
- Choose a supplier group (from the groups created on the supplier Groups page).
- Specify whether the customer is an individual (default is non-individual).
- If the supplier is an individual, contact details are not required.
- If the supplier is not an individual, contact information must be provided.
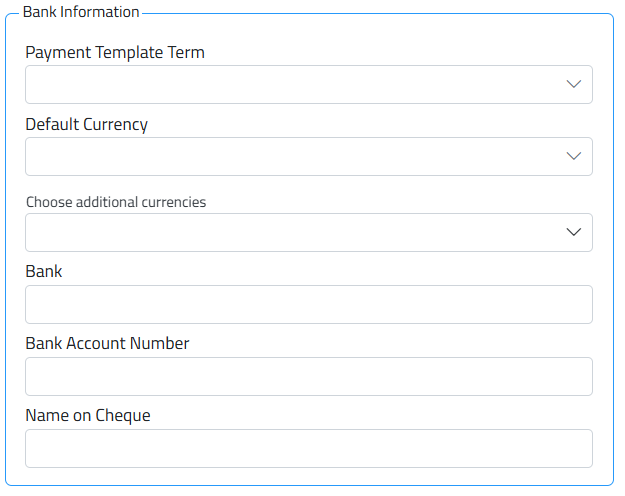
- Enter banking information: bank name, account number, name on the check, and credit limit.
- Choose payment terms (created on the Payment Terms page).
Managing Supplier Details
- Double-click the customer record or click the Edit button to view details.
- Make necessary changes and click Add.
Deleting a Supplier
- To delete a supplier (you must have permission), click the Delete button.
Exporting to Excel

- You can export supplier data by clicking the Export to Excel button.
Representative
This page allows users to manage and assign employees as purchase representatives to use it in operations.
Display Options:

- Grid View: Displays the data in a table format for easy comparison.

- Cards View: Shows the information in card-based format, offering a more visual layout.
Creating a New Purchase Representative:
- Before assigning a purchase representative, ensure the employee is already created in the system.
- Click the Add button, then search for the employee by name.

Modifying Records
- To delete a purchase representative, click the Delete button.
Customization of Columns:

- You can customize the view by selecting specific columns to display the information that is most relevant to you.
Products
This page allows you to view, manage, and search for all products in your inventory. It provides essential information and tools to help you efficiently handle your product listings.
Note : Any record within the inventory module will be displayed here.
Search for products:
- By entering the product barcode, SKU, or supplier code

- Using advanced search function.
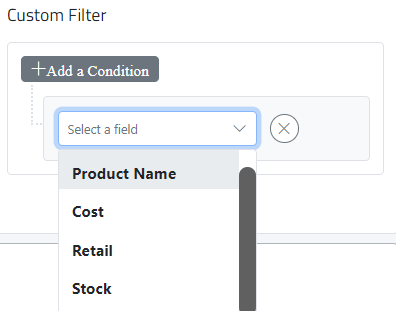
Add a condition by selecting the desired field.
then selecting the condition

as well as filter the products by their tags.
*Product Tag is a label assigned to a product to categorize or identify it based on specific attributes and characteristics*
To add new product tag, go to ” Setup > Product tags”

How to create a new product
Create new product:
Selecting the Parent Category:
You must select the Parent Category that you have entered in the products > Categories page in inventory module
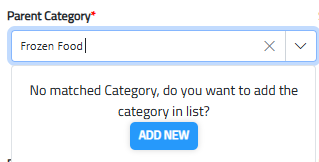
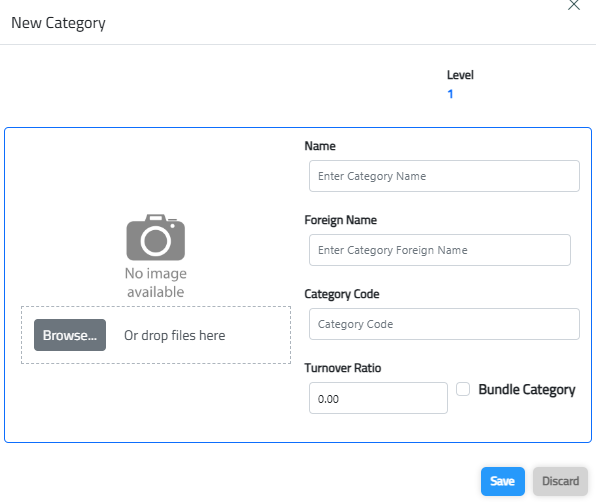
You can add a new category on the same page by typing the category name and clicking on the “Add New” button.
Selecting the Sub-category:
Select the subcategory related to the chosen main category.
You can add a new subcategory on the same page by typing the subcategory name and clicking on the “Add New” button.

Product Name:
Enter the product name and product foreign name.
Product Type:
Choose the type of product is it Retail or Service.
Product Expiry:
If the product is expirable, you will have to enter the expiration date.


Selecting the Manufacturer:
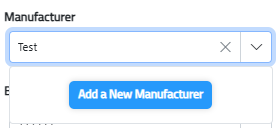
Choose the manufacturer of the product. If you want to add a new manufacturer, type the name and select “Add a New Manufacturer.”
Selecting the Brand:
Choose the brand of the product. If you want to add a new brand, type the name and click on “Add New Brand.”
Selecting the Unit of Measurement Category:
All units of measurement added in the setup > Units of Measurement page.
Select the unit of measurement category you have previously added. For example, if the main category you selected is “Length,” all related subunits will appear. In this case, the unit “Centimeter” will appear in the unit field.
If you want to add another unit of measurement (such as Kilometer), just click on “Add Unit.”

Unit of measurement information will show in the product page ” Products units “:
Adding Barcode and retail price:
After selecting or adding a new unit, you can now add the barcode for the unit. Enter the retail price for the selected unit.
Add Product Reference:
After adding the unit of measurement, you will move to the step of determining whether to add a reference number for the item.
Once you choose to add a reference number, a dropdown list containing all suppliers added in the accounting system will appear. After selecting the supplier, you can enter the reference number for the item.

Adding Multiple Variants:
Adding variants helps in accurately tracking inventory, as you can know the quantities available for each type. It also facilitates sales analysis based on variants, helping you identify the best-selling and preferred types.
To add variants to the product:
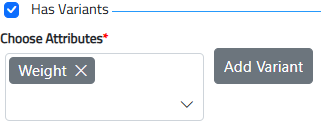
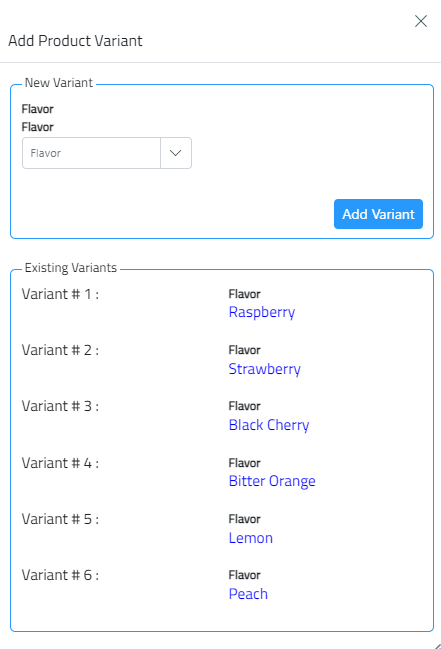
Select the ” Choose Attributes” , then choose the variants you want from the dropdown list containing the variants previously entered in the Setup > Product Attributes page.

After selecting the variant, click on “Add Variant,” and a popup window will appear where you can add variant options, you can choose more than one attribute.
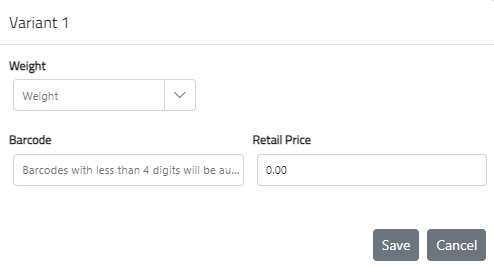
For example, when selecting the “Color” variant, all related color options will appear. Then, enter the barcode and retail price for the selected variant.
Note: Variants added will have specific barcodes. Therefore, the Unit of Measurement barcode field will be ignored as it will not be necessary after selecting “Multiple Variants.”
Product Detail Page

The Products Page provides an overview and management options for your products.
- Category: The first section displayed is the product category, which can be modified as needed.
- Tags, Manufacturer, and Brand: You can add new tags, manufacturers, or brands by simply typing the name and clicking “Add New.”
- Product Type and UOM (Unit of Measurement): These fields are fixed and cannot be changed after being set.
Product Details:
- Description Tab: This section is used for product descriptions that will appear on your e-commerce website.

- Product Details Tab: Here, you’ll find detailed product information, including:
- Product Name
- Product Foreign Name
- SKU
- Remarks
- Stock in Store and Stock in Company
- Initial Cost and Average Cost: The Cost of the Product from the Supplier.

Product Image:
Click on the image to Add a new image.
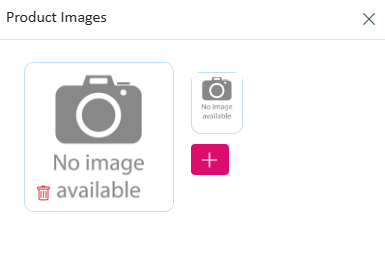
Click on the Add button to add an image,
Browse and select an image or drag and drop an image in the box, and the system will upload the image.
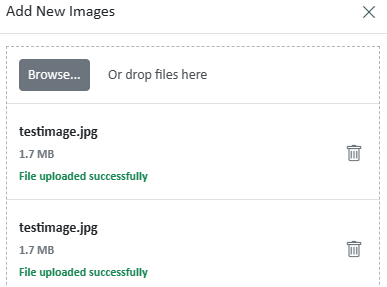
Select Single or multiple images of the product.
Click upload to upload the images. or click clear to remove the images.
If the product has variants, a Variants Tab will appear


Each variant’s description will be displayed separately, ensuring that users can view the specific details of the chosen variant.
To add new variant, click on the button:

Product Unit Tab:
This contains all the product’s unit of measurement and their retail prices and barcodes.

Add a new product unit by clicking the add button.
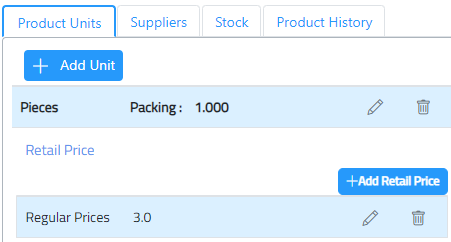
Select the unit from the drop-down, if new units under the unit category need to be created, add the units in the unit of measurement page in the setup tab.
If the unit allows changing the packing amount, then the user can enter the desired packing amount.
Save the unit by clicking the save button.
Retail Price:
Each unit of measurement can have retail prices for each location based on the price group it belongs to.
click the add button
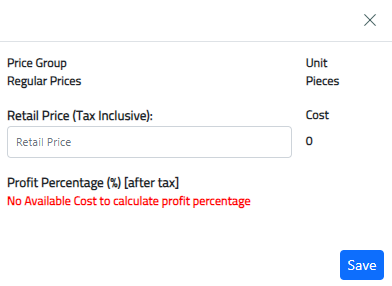
By viewing the Product units, the user can also verify which unit of measurement they are adding the retail price on.
If the policy on editing the retail price is allowed, then the user who has the adding price permission can edit the retail price.
Barcode:
Each unit of measurement can have a list of barcodes for each location.
If the user has permission to add barcodes, then the user can create a new Barcode.
To add Barcode,

Click the add button
When the barcode type is normal:
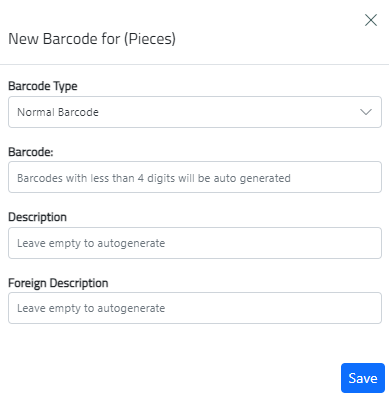
The user can enter a specific value for the barcode, description in the main language of the company, foreign description in the foreign language of the company, or leave them blank for the system to generate them.
and click save.
when the Barcode type is Scale:
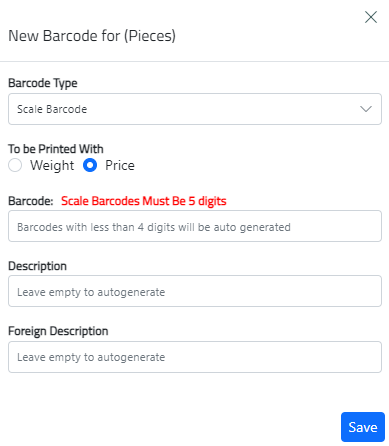
Choose what the barcode should be printed with:
Enter a specific value for the barcode.
Enter the description in the main language of the company, and the foreign description in the foreign language of the company, or leave them blank for the system to generate them.
and click save.
If the product is expirable:

Enter Expiry date.
To print the barcode:
Supported Printers ( Zebra – All Models )
Supported Operating Systems ( Windows 7 / Windows 10 / Windows 11 – Macos )
Note: More supported printers & operating systems in the next release.
Note: You will need to download JS printer and install it
https://seenerp.com/documentation/js-printer-download/
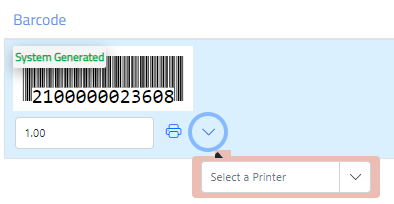
Select a printer.
If the printer is not connected, then go to the locations report on the locations page in the setup tab, and connect the printer.
Enter the number of copies required to be printed and click on the print button.
Note: Barcodes are only visible/ enabled when the policy allows to show the barcodes in the product detail page
Suppliers Tab:
In the Suppliers Tab, you can add a new Product Reference by entering the necessary details.
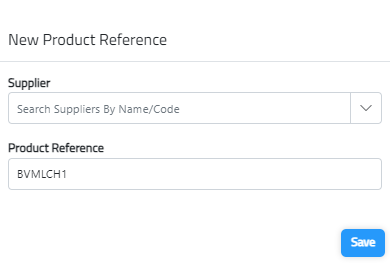

Once added, you can click on the eye icon to view the supplier’s product history


allowing you to see past transactions and relevant product information.
Stock Tab:
This tab shows the quantity and average cost of the stock available at the different locations.

This tab keeps track of all the current stock information of the product in the various locations under the company, their Average cost, the received from, Date, and their history.
When there is a change in the Qty and cost of the stock of the product, this gets automatically updated.

To view the stock transaction history click this button.
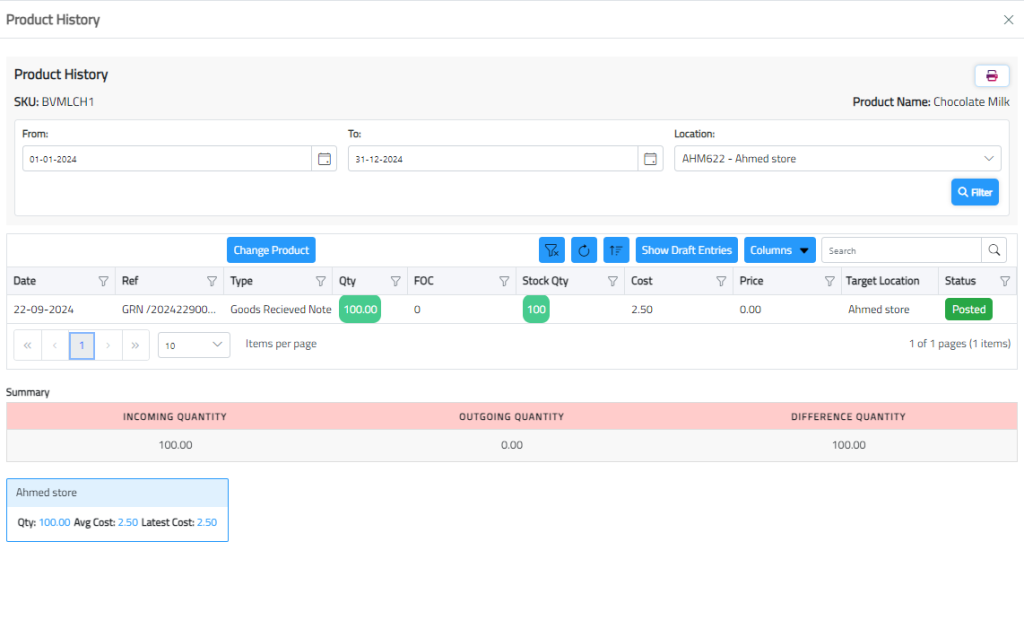
You can select another product by clicking on Change Product button.

Product History tab:
View the location-specific history of the product stock.
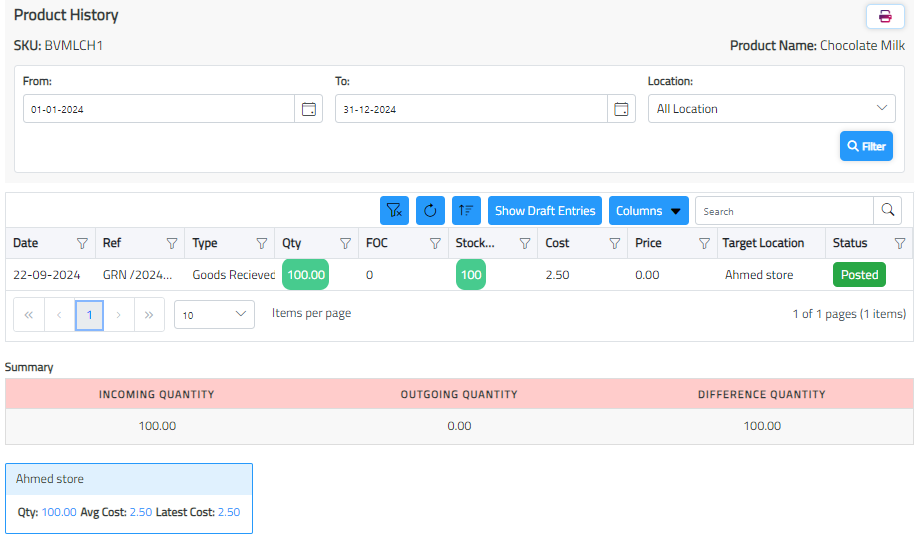
Displays the SKU of the product, the supplier references, and the unit of measure based on the supplier’s references.
Overview of QTY, AVG Cost, & Latest Cost:
The system shows the quantity, average, and latest cost for the product in each location.
Filtering:
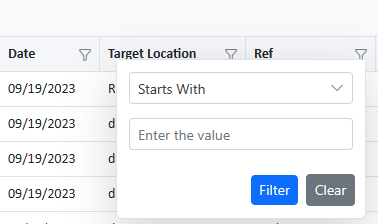
The system displays all the transactions that occurred on the stock of the product.

The show draft entries button highlights the entries that have draft status.
Brands
The brands are associated with the products. when creating a product user must select a brand.
Add New Brand

The user can create a brand on this page by clicking the add record button.
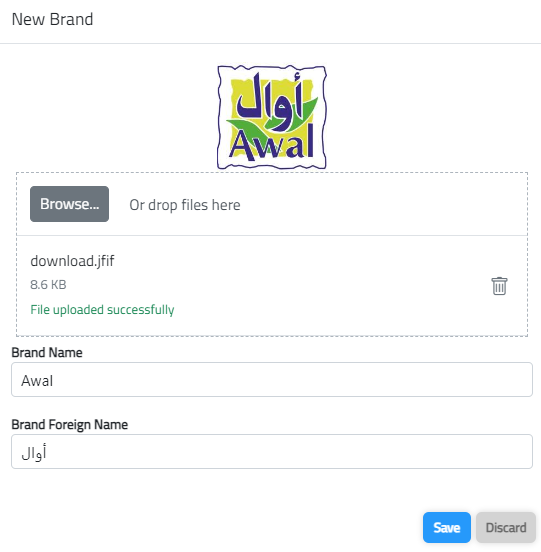
Upload an image of the brand by browsing or drag and drop.
Enter the brand name in English and Arabic.
Edit Brand:
| Then make the required changes and click save. |  |
Manufacturers
The manufacturers are directly associated with the products, when creating a new product the user must select a manufacturer.
Note : Any record within the inventory module will be displayed here.
Add new manufacturer

click on the add button

Enter the name of the manufacturer and select the country of origin.

| click on save button |  |
