Machine Setup
Printers
Click on Add new printer:
Add printer information, Headers, Transactions Fonts, Footers and Replacement Footers.


Machines
This page facilitates machine management, allowing you to view, edit, delete, and add machines to the system. To add a new machine click on the add new machine button.

Information: Enter the Machine name and remarks
Printer: Enter the number of lines, the top margin, left margin in pixels, and select if the cash drawer is connected to the printer.
Display setting: Select if the display is extended, Enter the port number, display name, and message, and select if the Printer is connected to the display.
Is Extended option: means the POS setup includes two screens: one for the cashier and one for the customer.
Cash drawer setting: Enter the number then click on the save button.
Modifying records.
To edit the record, double-click on the record and the system will display the form, make the necessary changes, and click on the save button.
Point of Sales Shortcuts
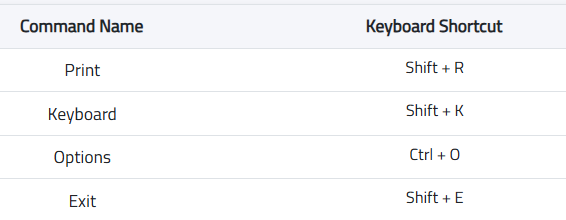
The system autogenerates shortcuts and displays all the shortcuts in the POS module and the user can edit them.

The Point of Sale (POS) shortcuts are accessible in the billing page under the following circumstances:
1. POS with keyboard only.
2. POS with keyboard and mouse.
3. Touch screen POS.
It is worth noting that there is no requirement to memorize the shortcuts, as they are conveniently displayed on the tool tip.
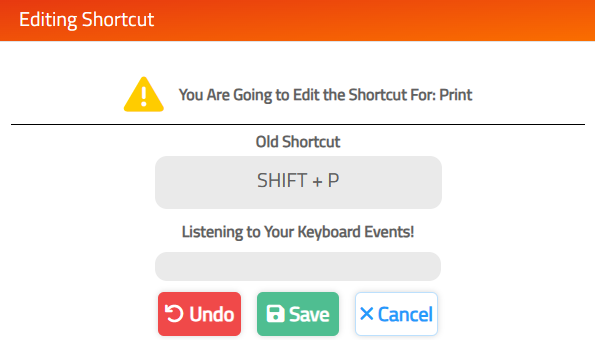
Modifying the shortcut:
Double-click on the record to modify the shortcut.

Click on the yes button to change the current shortcut.

Press the keys to record them as the new shortcut, once the action is performed the system will show the new shortcut, confirm by clicking the save button or click on the undo button to try pressing the shortcut again.
Note: If the new shortcut that the user entered already exists then the system shows a message saying the shortcut already exists and prompts the user to create another shortcut.
POS product category
This page allows for the viewing and assignment of secondary names to product categories.
The product categories are created in the inventory module and must be downloaded to the POS downloads page for them to be retrieved on this page.

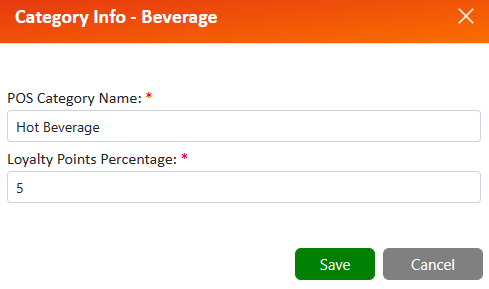
To add/ modify the secondary names of the categories click on the edit button.

Enter the Category name and if the category needs to have a loyalty points parentage, then enter the amount and click on the save button.
Once the changes are made in the fields, the save button will appear.

Expand the category to view the child categories by clicking on the expand icon.

Collapse All the categories by clicking on the collapse all button.
